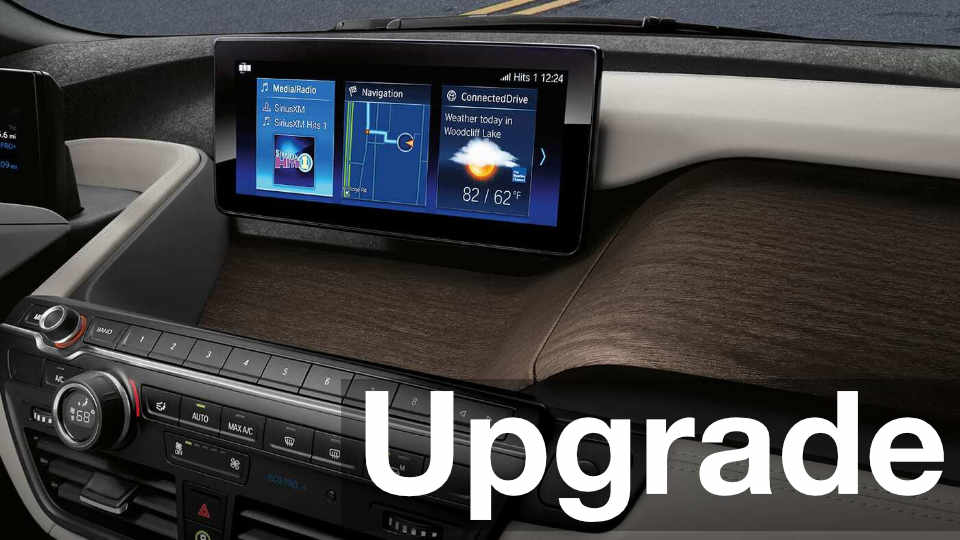
The BMW i3 is an amazing electric car with a futuristic look and cutting edge technology. Older model i3 EVs now being offered in the used market represent an excellent value and can often be found for less than 50% of the original MSRP. Prospective purchasers are offered many options and upgrades from which to choose, including two nav screen sizes: a lackluster standard 6.6″ central information display or the upgraded 10.25″ display. Unfortunately, the standard 6.6″ display significantly diminishes driver enjoyment of the BMW iDrive system and is woefully unsuitable for Apple Carplay.
Can You Upgrade The Nav Screen In A Used BMW i3?
Yes. You can upgrade your 2013 to 2017 BMW i3 6.6″ nav screen to the larger 10.25″ display for approximately $400 in just 15 minutes. It is VERY easy to do yourself and the required post-install coding can be accomplished from your iPhone with a readily available bluetooth adapter. Interested? Read on …
Parts Required To Upgrade Screen
BMW 10.25″ Central Information Display, Part #65509306743
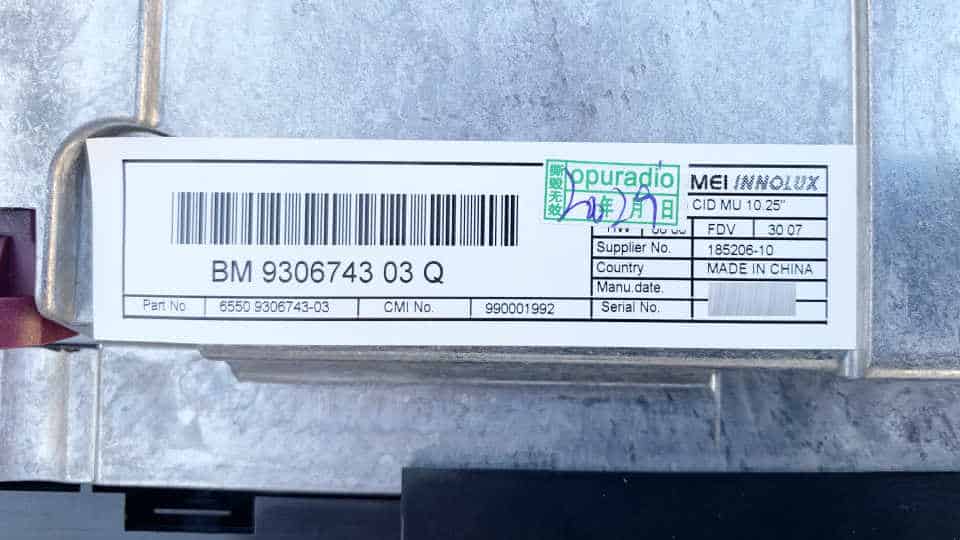
An original 2013 to 2017 OEM enhanced 10.25″ display can be purchased from any BMW dealer and has a MSRP of $3,350. This display is manufactured in China by Chimei Innolux and has the BMW logo on the back. DO NO BUY THIS DISPLAY FROM BMW, IT IS TOO EXPENSIVE!
The exact same display can be purchased on aliexpress.com from several different distributors for approximately $400 (prices change daily) by searching “Chimei Innolux 65509306743” or by clicking the link above. *UPDATE – As of May 1, 2021, the price of this replacement screen has skyrocketed to more than $750. This is an actual BMW OEM display. However, it is gray market and can’t be sold as “BMW” so the distributors put their inspection label over the BMW logo on the back as can been seen in the picture above.
We ordered one and it took approximately one week to arrive and was impeccably packed. It looked great right out of the box and works flawlessly.
• Find the 10.25″ display on AliExpress.
! NOTE REGARDING 2018 AND LATER i3 MODELS ! – This display will not work in 2018 and later BMWs. Apparently, in 2018, they switched suppliers from the Chinese company Chimei Innolux to Kyocera, a Japanese company, and modders have discovered that these older displays will not work in newer vehicles or vice versa. Also, Japan has much stricter controls on their tech IP so gray market 10.25″ upgrade screens made by Kyocera for the 2018 and later BMW i3 are almost impossible to find.
Tools Required To Remove And Install Displays
Torx T4 Screwdriver And Tweezers
A Torx T4 screwdriver and Tweezers will be required to remove two screws that secure the central information display to the dash. We prefer the iFixit Pro Tech Toolkit as the individual tools are very high end and the magnetic lid has built sections to help organize removed pieces when disassembling. However, for this task, all you really need are the Torx T4 screwdriver and the tweezers.
Veepeak OBDCheck BLE+ Bluetooth 4.0 OBD2 Scanner
Once you have replaced the smaller 6.6″ display with the larger 10.25″ display, you will need to recode your BMW i3 to output a compatible video signal for the new larger and higher resolution nav screen. This can easily be accomplished with an On-Board Diagnostics Scanner that you temporarily plug in under the dash and access via bluetooth with your mobile phone. We prefer the Veepeak OBDCheck BLE+ Bluetooth 4.0 OBD2 Scanner because it works well with the required BimmerCode app.
Software Required To Code BMW i3 For Upgraded 10.25″ Screen
BimmerCode For iOS or Android

Recoding your BMW to output the correct video signal for your upgraded 10.25″ display can be extremely complicated or extremely easy … we like easy. Therefore, we prefer using BimmerCode for iOS or Android. This app truly is the holy grail for BMW modding.
• Find the BimmerCode app on their website.
How To Upgrade The Nav Screen On Your BMW i3
Remove Cover Plugs From Old 6.6″ Display

Remove the two cover plugs from the top of your old 6.6″ display using tweezers or a very small flat-head screwdriver. If you damage the edge of the cover during removal, replacement covers can be ordered directly from your BMW dealer for about $3 each.
Remove Two Torx T4 Screws From Old 6.6″ Display
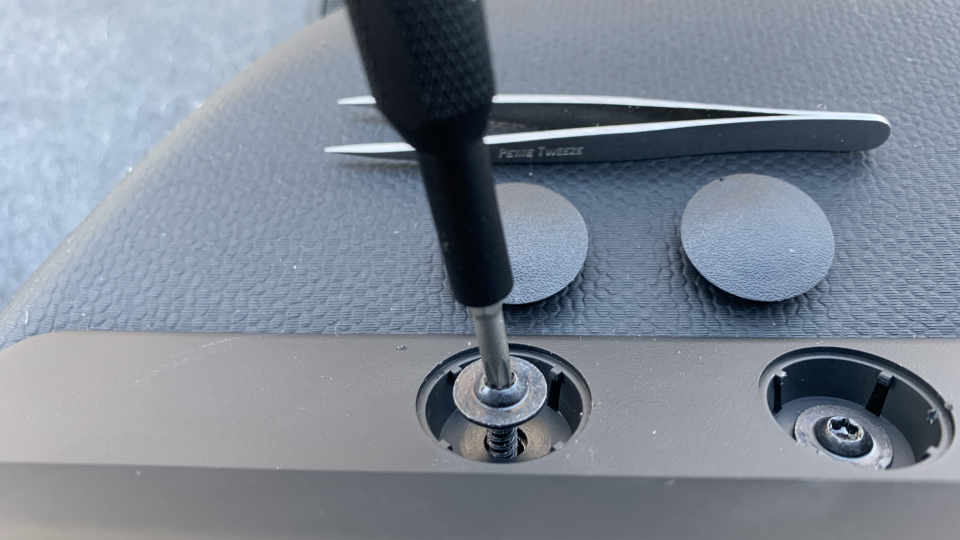
Remove the two T4 Torx Screws from the top of your old 6.6″ display using a T4 Torx Screwdriver.
Lift Old 6.6″ Display Straight Up
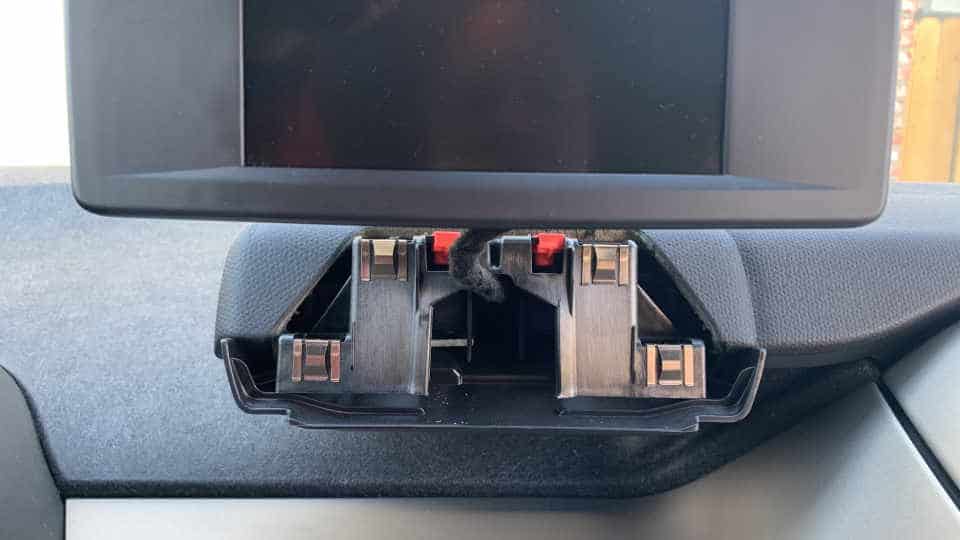
Lift your old 6.6″ display straight up and off of the display mounting bracket, but do not pull away from the dash. There is a display cable connecting the display to the dash.
Disconnect Display Cable
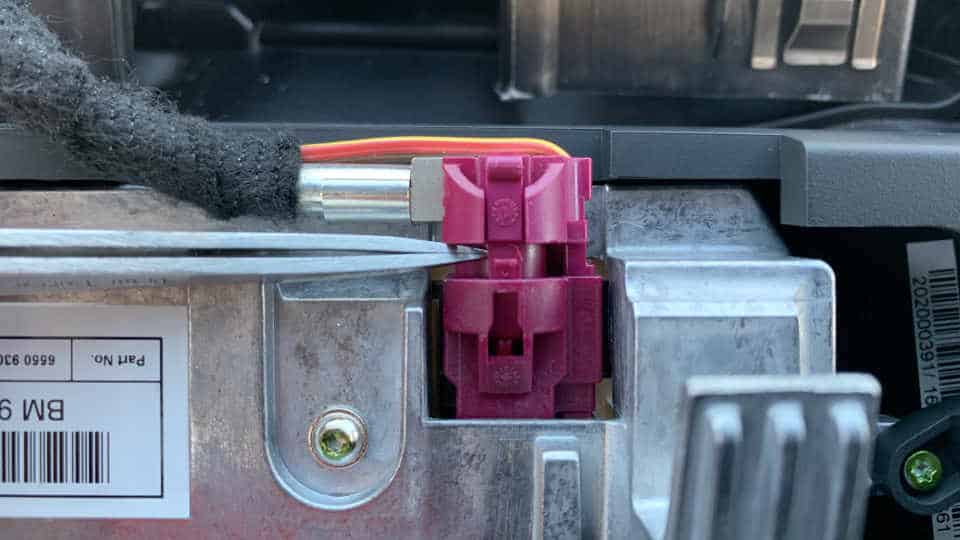
Gently disconnect the display cable from your old display. We used tweezers, but a small flat-head screwdriver will work as well. Make a note of how the connections fit together for reassembly.
Reverse Process To Install New 10.25″ Display
To install the new display, simply reverse the process: 1) connect the display cable to your new 10.25″ display, 2) slide your new display straight down onto the display mounting bracket making sure not to pinch the display cable, 3) install two T4 Torx screws to secure your new display to the display mounting bracket, and 4) reattach the two cover plugs. After your new display is physically installed, you need to recode your BMW i3 to recognize the new larger screen and its higher resolution.
Code BMW i3 Nav Screen Upgrade With BimmerCode App
Coding your BMW i3 to work with your upgraded nav screen can be easily accomplished using a Veepeak OBD2 bluetooth scanner and BimmerCode for iOS or Android. Here is how to do it …
Attach Veepeak OBD2 Scanner Under Dash
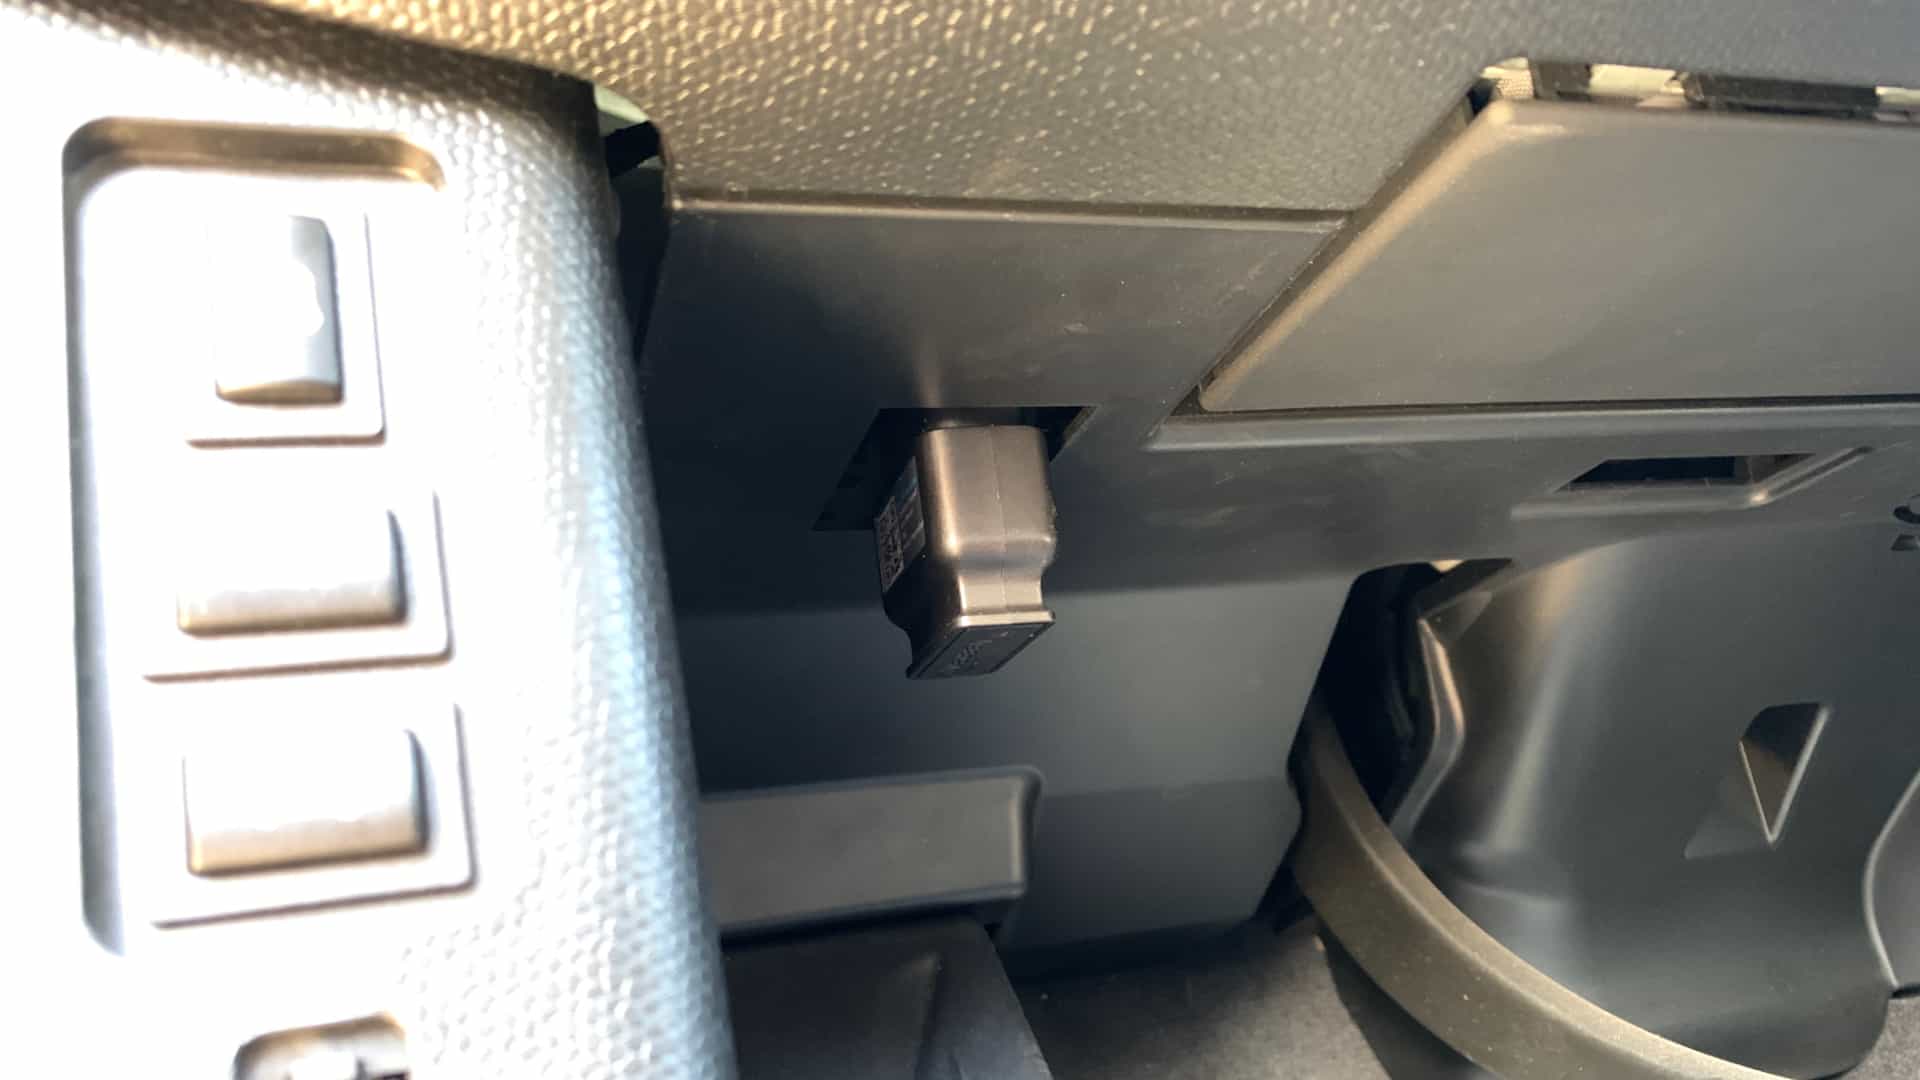
Attach the Veepak OBD2 scanner to the OBD port under the dash. Make sure to check the alignment and push straight up to prevent damaging the pins.
Use BimmerCode to Code BMW i3 For Upgraded 10.25″ Screen
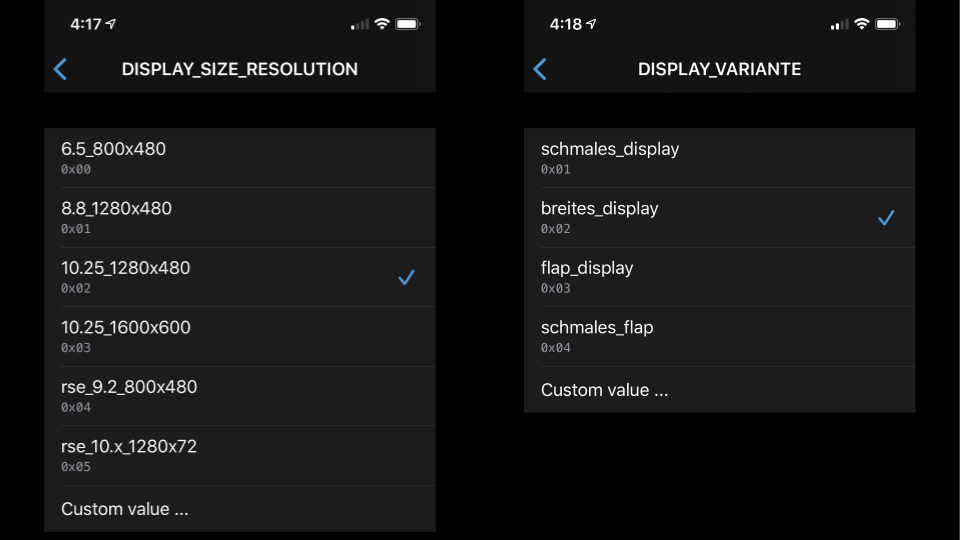
Once you have connected to the Veepeak OBD2 Scanner using the BimmerCode app, there are two settings that must be changed in order to use your new 10.25″ display: Display Size Resolution and Display Variante.
To change the Display Size Resolution setting, navigate the BimmerCode menus as follows:
Headunit (HU_NBT) > Enable [EXPERT MODE] > 3000 HMI > DISPLAY_SIZE_RESOLUTION
The correct setting is: 10.25_1280x480
To change the Display Variante setting, navigate the BimmerCode menus as follows:
Headunit (HU_NBT) > Enable [EXPERT MODE] > 3001 EXBOX > DISPLAY_VARIANTE
The correct setting is: breites_display
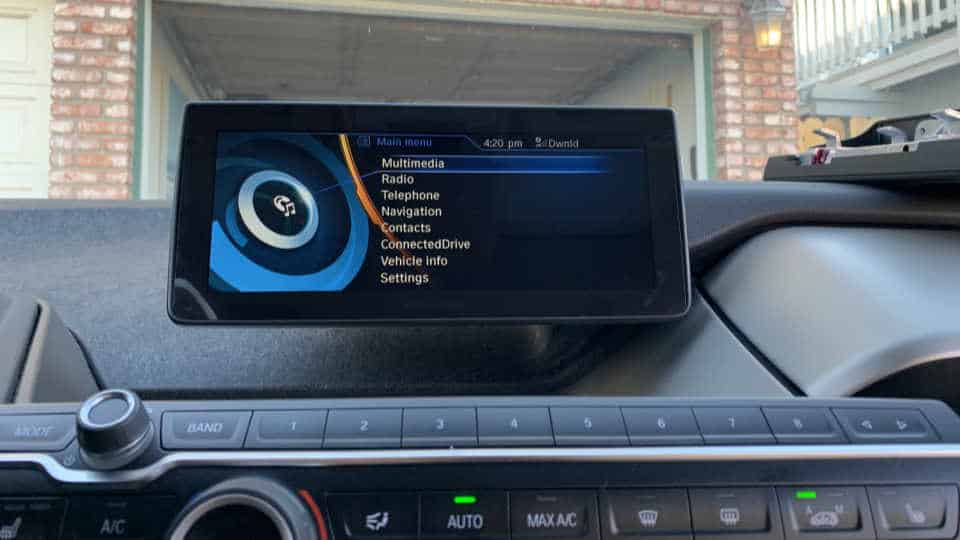
Exit back to the main menu, hit [CODE] and that’s it! The app will reboot the BMW i3’s computer and your new gorgeous 10.25″ display should start right up.
Summary
Upgrading your BMW i3’s nav screen from the smaller and lower resolution 6.6″ display to the larger and higher resolution 10.25″ display is simple, only takes about 15 minutes, and costs about $400. From reading the BMW forums, it seems like most modders’ reservations about the procedure come from 1) buying the larger screen from China and 2) coding the i3 to recognize the new screen. As we have shown, it takes only about one week to receive a new OEM screen from China and the coding is no more difficult than changing a setting on your phone. If you upgrade your nav screen using these instructions, or if you have any questions before proceeding with the retrofit, please let us know in the comments section below. Good luck!
Source
BMW i3: Website